If you're not an electrical engineer, it's easy to get confused about the difference between speaker wire gauge and ampacity. It's also easy to see why that confusion exists. The two terms are closely related, but they don't mean the same thing. Let's take a look at what each term means and how they relate to one another so you can make sense of them both.
In electrical engineering, a gauge is a measure of the thickness of a wire. The thicker the wire, the larger the gauge number. Ampacity is the maximum amount of current that a wire can carry without overheating. So, for given wire size, the larger the gauge number, the higher the ampacity.
But what does this have to do with speakers? When you're selecting speaker wire, you need to choose one that has a higher ampacity than your amplifier's maximum output rating. This will ensure that the wire doesn't overheat and fail. In general, you'll want to use speaker wire with a gauge number that is at least as large as the amplifier's output rating. For example, if your amplifier has a maximum output rating of 100 watts, you'll want to use a speaker wire with a gauge number of at least 10.
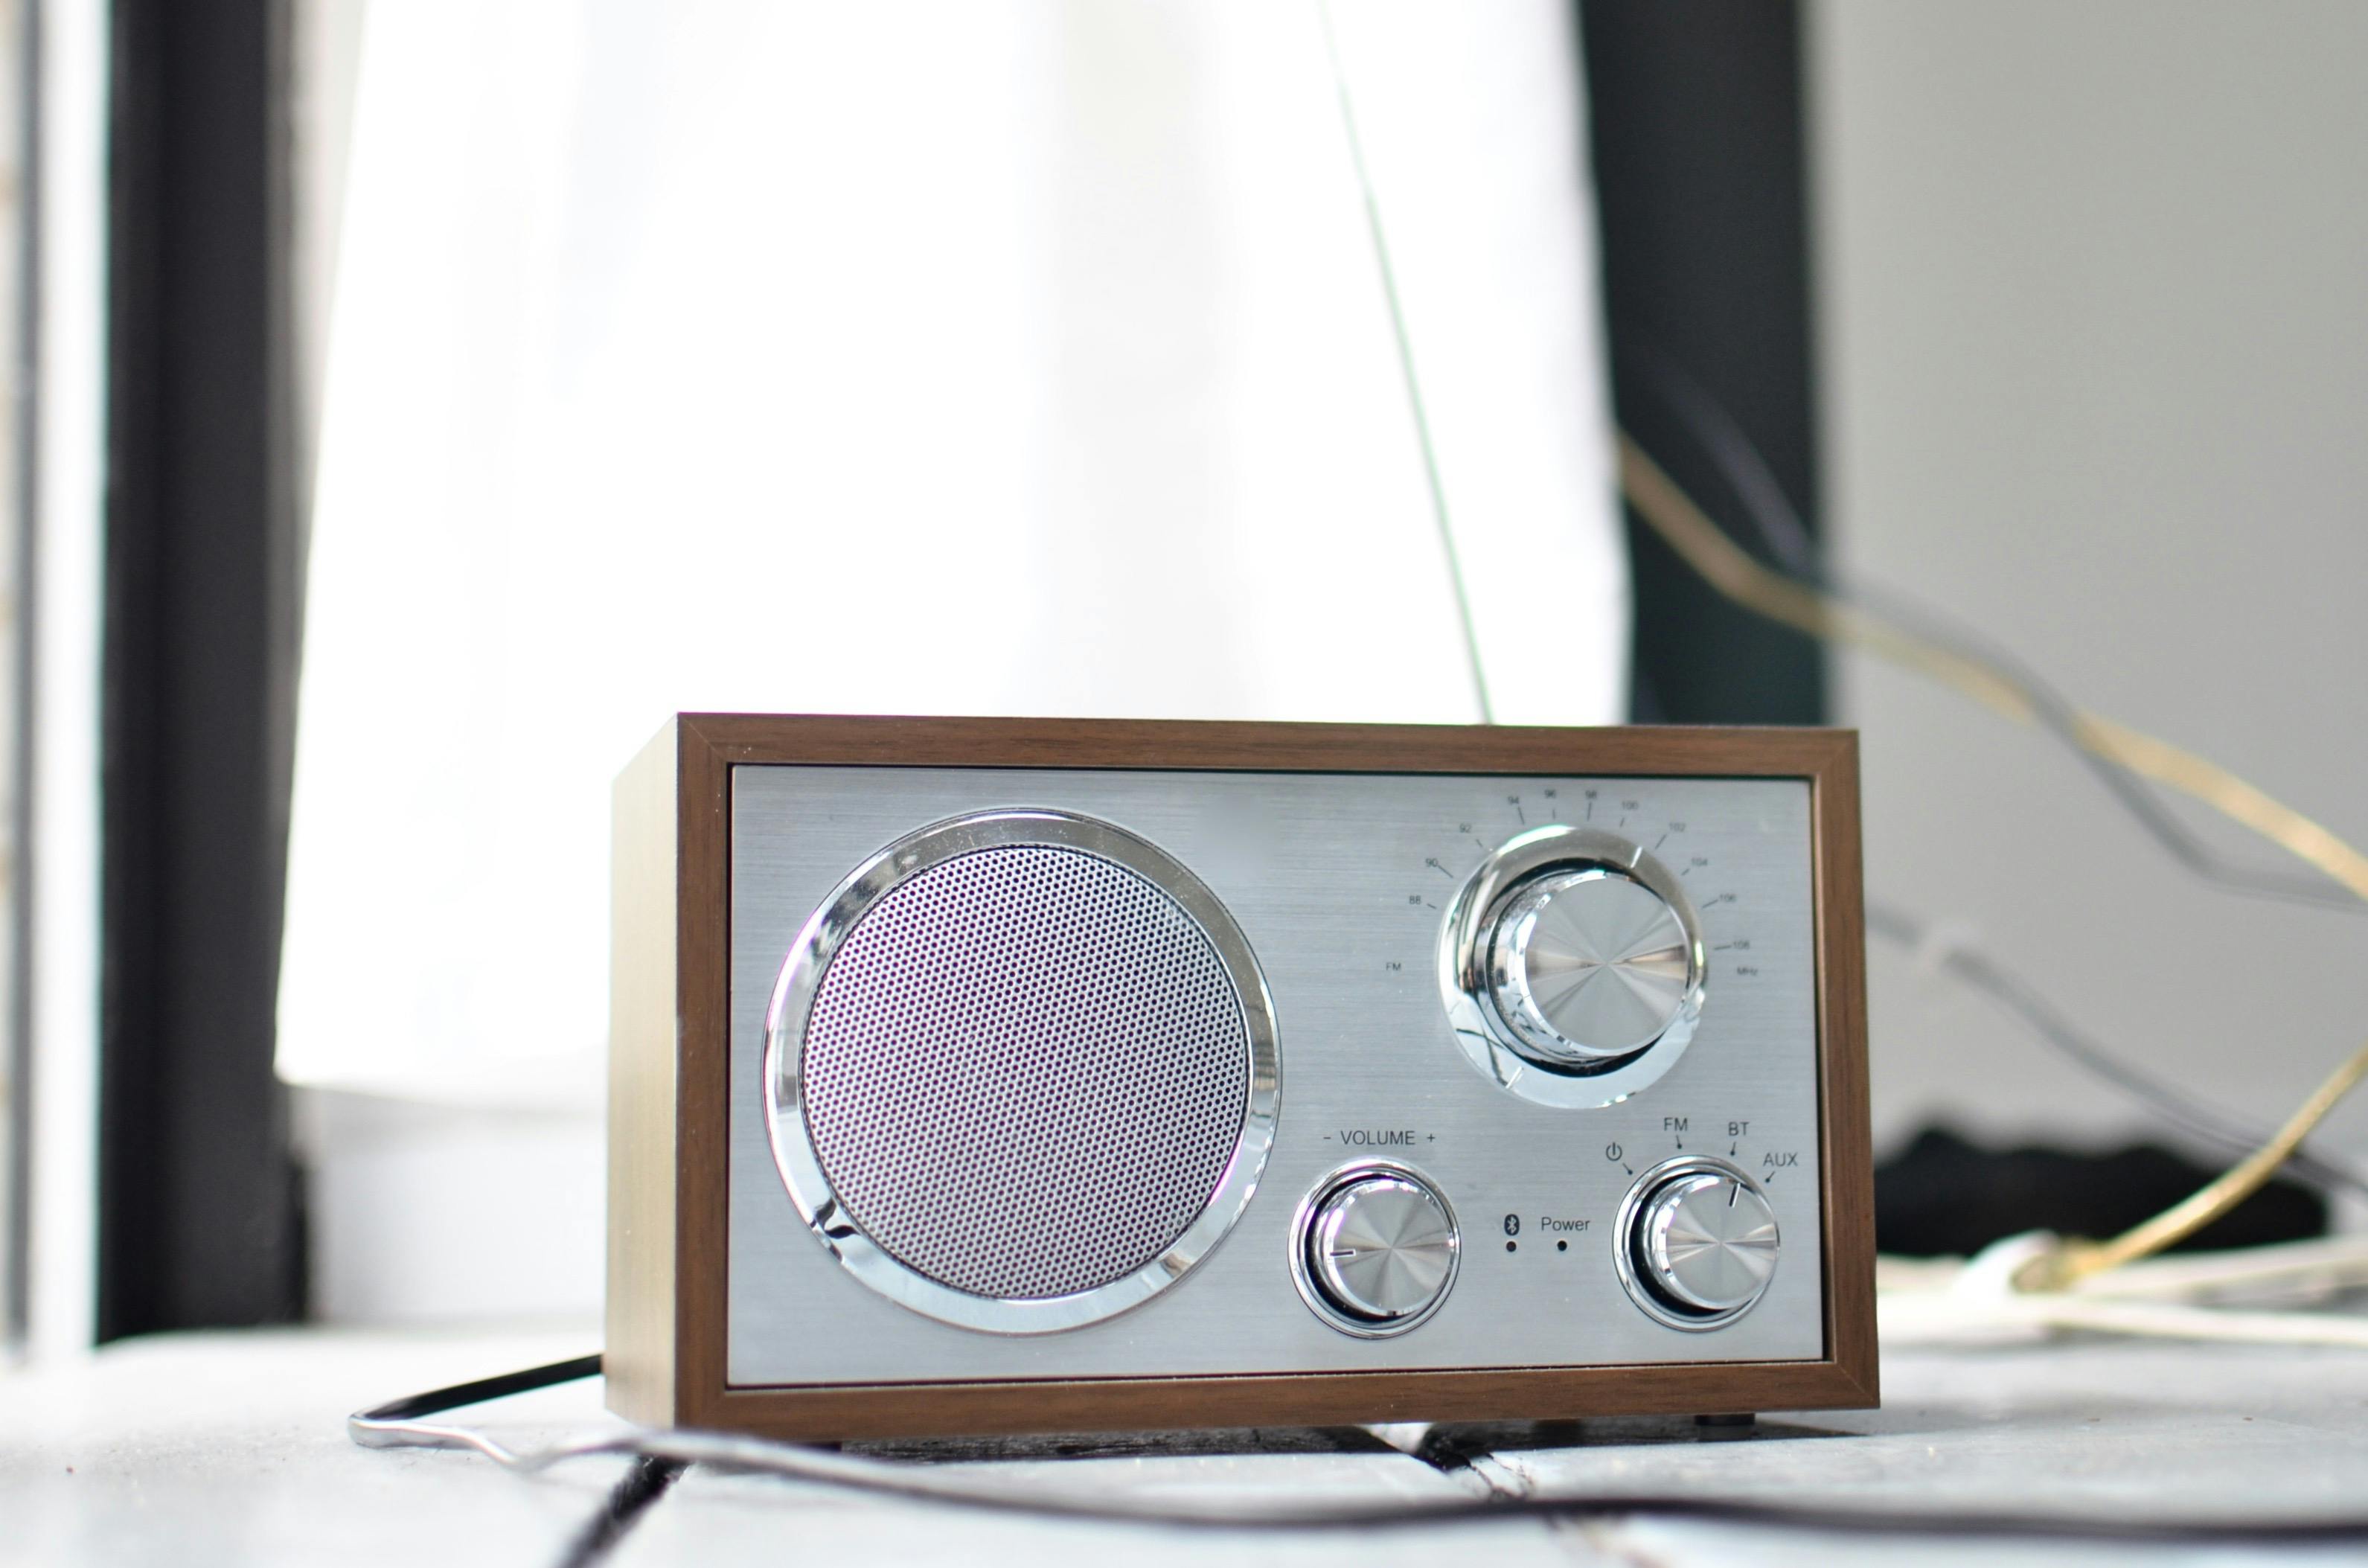
8 gauge speaker wire
8 gauge speaker wire has the same ampacity as 12 gauge speaker wire, but 8 is smaller in diameter overall.
It's important to note that both speaker wire gauge and ampacity are measures of resistance—the more electrical resistance a given length of wire has, the less current it can carry. Resistance is directly related to size: The larger the cross-sectional area of the wire, the lower its electric resistance per unit length. But they have different effects on your sound system. Overloaded low-gauge speaker wiring will distort sound by introducing some nasty-sounding harmonic distortion into your music or movie soundtrack.
Overloading an amplifier is very bad for it and greatly decreases its lifespan.
Speaker wire amps are always rated at "continuous", not "peak" output.
Peak power is the maximum power a speaker can handle for a very short period. Continuous power is the average amount of power that a speaker can handle over an extended period.
Most amplifiers are rated for their continuous power output, so you'll want to choose a speaker wire that has an ampacity rating that's higher than your amplifier's continuous rating. This will ensure that the wire can handle the average amount of current your amplifier produces without overheating.
12 gauge speaker wire
So, how do you know if the speaker wire gauge is larger than your amplifier's continuous power rating? Manufacturers list this information on their spec sheets for most speakers and amplifiers. On the speaker end of things, they list a minimum recommended speaker wire size with a corresponding ampacity. You can find these specs online or in the documentation that comes with your new speakers. If you don't have them handy, contact the manufacturer directly to request them.
Of course, if you already bought a set of speakers without considering what type of speaker wire to use with them, it's not too late to get help even after the fact. The technical support line for your particular brand will be able to help big time. They can steer you towards the correct gauge wire for your make and model, and possibly even send you the specs you need to ensure a good connection.
In the end, it's always a good idea to have more ampacity than you think you'll ever need. It's better to be safe than sorry when it comes to your sound system!
Gauge vs Ampacity
So, what's the difference between speaker wire gauge and ampacity? Simply put, a speaker wire gauge is a measure of thickness while ampacity is the maximum amount of current a wire can carry without overheating. When selecting a speaker wire, you'll want to choose one that has a higher ampacity rating than your amplifier's maximum output rating. This will ensure that the wire doesn't overheat and fail.
This shows that Yamaha has been making AV receivers for years and has become widely accepted for the one that doesn't just live up to their established reputation. Often, in the standard AV receiver industry, you have to have to be able to deliver a wide array of both great quality and value to remain competitive. Although maintaining extremely high expectations in terms of production, they often failed to live up to the price of their reputation, which put them in second place among other motorcycle manufacturers. This top of the RX-V series analysis would evaluate the Yamaha's likelihood of competing with the middle class, and thus they need to demonstrate their ability to meet that.
Yamaha's audio/video receiver/amplifiers are almost often broken up into two separate classifications, being entry-level and mid-level models. They have the Aventage premium RX series, which provide features and quality, and an economical value, and the smaller, RX series which offers sound and quality in a smaller price. Today's most mainstream RX-V685 is in the more RX-V series and is about success and value.
In essence, the Yamaha RXV685 is a 7.2-powered receiver with Virtual DSP capability. Virtual DSP allows it to generate 7.2 channels of surround sound with 90 watts of power. This receiver is also includes YPAOupzo, a full variety of additional features, including High Resolution Audio, Virtual DSP, and supports DTS as well as AirPlay 2 (virtual DSP), MultiZone functionality, and Virtual I/O youZO. but is the hardware like its pricing and specifications, decent enough to thrive in the current market, or will it be drowned out by competition from other vendors that offer a similar product with good price and specifications? As you read on, you will learn.
Creativity
As compared to 2017, the RX-V683 was considered the most expensive and best of the three releases to be on the 2018 XBR-VX line, this AV receiver adds the missing mid-range and is also not quite as well equipped, having most of the desirable features missing. new versions are released every year, but they have a small changes and simple enhancements added by the majority of them, including slapping a new version number and releasing the product Also, as a result, it is almost impossible to determine which one is which designs stay unchanged; hence, making this one design harder to recognize. Similar to the RX-V685 in terms of surface appearance, but with a key difference: The outer shell sounds and looks the same, but differs in that we will be detailed shortly
The trait of all Yamaha designs is that the front is in two sections. mirror style. Instead of a full-width around the whole length of buttons hosting the most important controls, the show has half that is thin, and houses a ring of smaller, circular controls under a shiny top surface. The controls in this pack include the zone 2 and radio controls amongst other assorted forms. There is just one single expansion button on the right. On the left, the microphone port is on the YPAO expansion unit, and on the power button side is the YP-20a microphone port.
The touchpad continues to have the same arrangement of controls, but has a brushed aluminum finish on the lower half while the buttons have remained unaltered. Ancillary inputs include a major on/prominentalance knobs on the right while left which also hides a headphone socket, offering quiet viewing for those who don't want to listen. While in the middle, we have a variety of keys, in addition to the different inputs and settings, such as Play, Pause, Stop, and Mute, we have four primary ones for Scene, Mute, Play and Zoom. We see two more physical control buttons next to the volume knob alongside an expansion port on the console, allowing you to connect USB drives as well as standard audio input.
Currently, there does not seem to be a single distinction between past and present versions of the RX-V683, though. Due to this move, you'll have to accommodate the loss of an expansion of the headphone jacks, there is an HDMI input location that has sprung up where USB was previously. It seems that they want to eliminate the HDMI input port in favor of the new RX-V679, and have moved it to the back as a result. The answer to this question is not as straightforward as it seems to be is might be, due to certain contextual issues we will return to later on, will be discussed in greater detail. Regardless of your preference, no matter how valuable you see this flexibility being, taking out the front HDMI port is seen today, it was once seen as a backward-step by some.
Construction quality
When it comes to construct quality, it's a majorly the Avantage series where you would want to focus your attention, as they highly advertise on their top-quality audio components and feature specific design features. The RX-V685 is the best example of the extraordinary amount of consideration that Yamaha's engineers put into any product, except the RX-series models, as it was more affordable and had expansion slots for expansion modules, despite being an afterthought to the initial design.
The circuitry used in this receiver features fully-differential power amplifiers in order to minimise distortion, and includes both digital and analogue power supplies to allow lowest possible distortion. A Burr-Brownsig Krakauer Precision Burloss R-384 kHz/32-bit DACs features four separate Burr-Brown chip power supplies, which minimizes noise to have a resolution of High-to-the-Video (Hi) Resolution sound transfer while also. As volume control circuits make use of greater heat sinks, the use of the alternative higher-quality internal capacitors are able to counteract the produced unwanted sound.
Of course, Yamaha encourages all its designers to make a sound investment in their projects and thus leaves little to chance in this price range. It invests in the research and development that leads to a better sound every step of the way, resulting in better sound being used with even the less expensive systems.
One can see that the unit's mid-tier existence is visible in the scale of the whole organization. Tightly dimensions of 17"x17-1/8" x 6-3/4" x 14-7/8" (435 x 18.5 x 16.3 cm) and weighing 23.1 lbs (10.5 kg), it's potentially one of the most compact sizes in the industry.
As you would expect, Yamaha totally altered their entire portfolio in 2018. The RX-V685 differs significantly from the RX-787 and might not be a day or night discrepancy, but is nonetheless very much on the right path for the most part, which is different for the whole lineup. Although although the buttons' appearance is not differing, the total number seems to be more refined. The number of buttons is not significantly increased; however, their arrangement is streamlined and made easy to spot.
We see the standard controls of scene, input, and presets on the left and audio on the outside, while playback buttons rest on the exterior of the main screen. It is large so we'd like to use a smaller one. The remote control can be uncomfortable to use when keeping a full arm's reach in the dark, even even though a person's hand is placed just a few inches apart, and that is something we take into consideration.
Before we end our account of this part, we want to say that we are very pleased with what we observed. The looks and style are similar, but not quite the same. One of the few things we would have liked to see in the Retina Display's absence was the lack of an HDMI port. However, the included remote control has been improved in as far and also has no backlight, which is obviously better, but still adds several switches, confusing control options.
Audiophonic quality
The RX-V685 is right where the more accommodating models live, which means that it has a good price-to-to-performance ratio for the average buyer. When it's been designed to generate an amplifier of 90 watts (8 ohms, 20 hertz, 0.06% of 2-channel drive) in the center and a final output of 50 watts (0.02 hertz, 20kHz, 8 ohms) it can be employed conveniently in homes and theaters with comfortable sound levels. the differences between seven channels (older receivers accept) and nine channels (advanced receivers accept), 5.2 or 7.2 DTS:X can be left as is the configuration or you can use everything this receiver has to give you a total of seven channels (either receivers or DTS).
Supporting the new audio formats like Dolby Atmos, the receiver also offers technology like DTS:X. It is possible to up-mix non-surround 2.0 formats to Dolby Digital Surround or DTS: The DTS: You can up-upmix old 2.0 mixes that are not using Dolby Surround or DOLBY Surround. There is another level of the analysis of which we must go beyond that, so we also gain new capabilities that we are going to study...
CinemaDSP 3D
CinemaDSP 3D was in this unit's Theater Edition that was available at the time, as an option for Yamaha owners. The receiver is also capable of recreating different sound fields such as concert halls and sports arenas and delivering an effect of being right in front of your face. the manner in which you will be able to successfully manipulate the end result will depend on different factors, but in general, you will be able to greatly expand your repertoire of ideas
Depending to how it is executed, the final effect sounds somewhat contrived, and over-the-processed in certain situations, while the overall image offers a greater sense of depth and dimension. We suggest that you give it a shot to find out if you like it on your own to find out if you want it on your own. Cinema DSP3D works with the Yamaha RX-V685 lets you monitor and optimize various speaker settings for each program to provide the best audio performance possible.
but, for the unit to operate with its virtual characteristics, this technology is essential (Also see Advanced Listening modes of Dolby Digital Expanded, and Dolby Virtual Surround are the main features.) Where it is not possible to use surround speakers at the viewing location, the Virtual Cinema function has special settings for Virtual Presence (Front is Ambient, Surround Rear, and DOLBY VIRTUAL, which support this location), allowing the effects to be provided by the Virtual Cinema's four digital rears.
It is possible to produce Atmos effects within the Virtual Presence by using only the Virtual Speaker while you can be sure that it is there, but not in Virtual Surround because it necessitates having surround speakers in use to activate it. Additionally, you should add immersive headphones to your viewing experience, and have it do little, as long as you have no intent on learning the movie's dialogue.
Atmos placement: In order to measure all of the channels accurately, we placed two Atmos ceiling speakers in the At the center of the test area and adjusted the volume for the other four speakers so they created an overhead soundstage. Battleship disk has done all of sound quality tests that it' Dolby Atmos is nowadays is a preferred option of ours because of its consistency and overall quality, so we selected it over a higher quality Dolby Atmos alternative.
Whatever criticisms may be levelled at Peter Berg's film, one undeniable fact is the tremendous DTS: no matter what you may think about it, DTS: you cannot disregard this. There are arguably the best scenes in modern times with naval warfare in a blockbuster movie that we saw in this film. Before moving on to the action of the U.S.S.S.R.D. Battleships, let's have an introductory fight between the alien craft and a pair of U.S.S.B. destroyers.
A really good guitar player gets that way from plenty of practice time. Those who stay with it realize that they truly love it, and family and friends like to hear them play. The following article can help you with a few basic assistance with how to get started. Utilize the advice in your favor!
Be sure you properly learn every one of the basic when you first start playing guitar. If this is the only piece that one could play, when you just might play one piece correctly, your abilities are pretty limited. Try locating a book or instructor to train you guitar basics. Learning things like how to pick, strum, and hold a guitar properly can assist you become a better player.
Learning music theory might help novice guitarists. It is among those classes that you either love or hate. The abilities may help your playing immensely. You can learn things like how you can read chord charts, sight-read written music, and all sorts of about note names. It can help you better understand and recognize what you play and hear.
Slow everything down if a sheet of material is proving especially difficult. That is only going to make things more challenging for you personally in the end, while you may naturally feel inclined to experience it fast. Receive the hang of your passage at the slow speed, then gradually increase your pace. You will be surprised at just how much easier the educational process becomes for you! You can check it here.
Choose the right quality guitar which will squeeze into your financial budget. Don't waste money by spending a ridiculous amount in your first guitar as you may give up it. Consider a few options to determine what feels comfortable. Learn how to tune your guitar while keeping it properly tuned.
Learning to play the guitar can be hard on your own fingers and hands. You will likely have to endure a little pain when you develop calluses. Learn specific finger practice exercises and do them daily to develop the muscles up to you. Otherwise, the hands may cramp up whilst you practice.
Your fingertips will receive sore with constant practice. It could hurt less playing a nylon-string or electric guitar. Steel-string varieties are generally the most painful for novice players. Even though you can soak your fingers in rubbing alcohol, never use turpentine or other harmful substances.
While you progress along your vacation to become a skilled guitar player, take a moment to find out your best type of music to play. Whether you like rock, jazz or classical guitar stylings, possessing a genre you truly love is the simplest way to allow your creativity and musical personality show.
Build up your finger strength. New guitarists may experience finger cramping whenever they start learning. The reason being your fingers aren't used to the constant movement. Try doing simple guitar exercises before you decide to play to produce their strength. A couple minutes doing something much like the caterpillar exercise will help increase your finger muscles.
Find a good balance between learning music theory and physically playing the guitar. Music theory is important to learn. If you're seriously interested in playing the guitar, it's important to study the technical side from it. Just don't forget to use all you've learned. Try to strike a good balance between your two.
Avoid spending a whole lot in your beginner guitar. You may well be inclined to purchase the fanciest guitar you find, however, you should resist. You could find soon enough that the guitar will not be ideal for you. Also, you can get great sound from a cheap guitar. It is very important think through regardless of whether you must produce a major investment.
The true secret to learning to be a better guitar playing is usually to practice whenever possible. It might be boring to apply alone at all times. So, turn your practice sessions into a pleasant time by having friends with it. You may practice by using a friend who plays guitar or jam using a friend who plays another instrument. You can also play to your small audience of youngsters or someone close that will be delighted on your budding skills.
Once you begin to understand the basic principles of guitar playing, you may well be tempted to pay attention to just one genre of music. However, this is a much better idea to help keep challenging yourself to learn new kinds of music so that your guitar skills are refined further, so you be a more versatile artist.
To avoid the discomfort linked to teaching yourself to play the guitar, your fingers will get callused. Avoid picking on your calluses. When you have rough skin or snags that you need to remove, work with an emery board to smooth your skin. You may soak callused fingers in rubbing alcohol but avoid using hazardous materials to toughen your skin layer.
Before attaining tab, try and play songs all by yourself. You can find an abundance of information online for learning and playing any song. However, learning to play by ear feels natural and makes learning songs much simpler.
Practice strumming your guitar. It helps you learn how to play chords and makes it easier to perform them. It can also help with regards to switching chords smoothly. So, take the time to simply strum since it has numerous benefits that will assist you become a better player.
Find out the different key signatures. In each key signature, you will discover a basic chord progression that one could learn. When you get familiar with these, you may improvise the accompaniment of several popular songs. This can be one good way to begin playing some real music and learn as well.
Now that you understand more details on learning how to play the guitar, you've got a fantastic base to begin with. Whether you might have always wanted to play or have just recently become enthusiastic about learning to play, the time has come to take your first steps. Have a great time!